Console and OOB (out of band management) using IPMI
Console and OOB (out of band management) using IPMI
Introduction
If your server won't boot or is inaccessible due to network issues or other problems, you can still access it using our built-in console feature for virtual servers or via IPMI for dedicated servers.
In this article, we'll walk you through how to use these functions.
Console for VMware and KVM servers
Start by logging into GleSYS Cloud, navigate to your organization and choose the project that your server is located in. If you only have access to one organization and one project, that should be automatically chosen for you.
In the left pane, click on Virtual Machines under the Compute-section.
Find your server in the list and press the Action button. Choose Console and then Open Console.

You should now have access to your server.
Note: Depending on your server’s systems locale and web browser, special character keys might not map correctly when entering your password.
IPMI
If you have a dedicated server with us, you should have received information on how to access your server, including the IP address and credentials. If you haven't received this information, please contact support at support@glesys.se, and we will assist you.
To access your server via IPMI, you must first connect to our VPN. The VPN account is provided free of charge for dedicated server customers and can be found in our control panel at https://cloud.glesys.com.
Access IPMI using your browser
From the browser of your choice, go to https://<The-IPv4-address-you-have-recived-from-us> and login using your credentials.
Note: There might be a certification warning, since we are accessing the page using IPv4 address over HTTPS.
Note: You should use ADMIN with capital letters as username.
Depending on the version of IPMI you have, the interface may vary. Here are the two most recent versions.
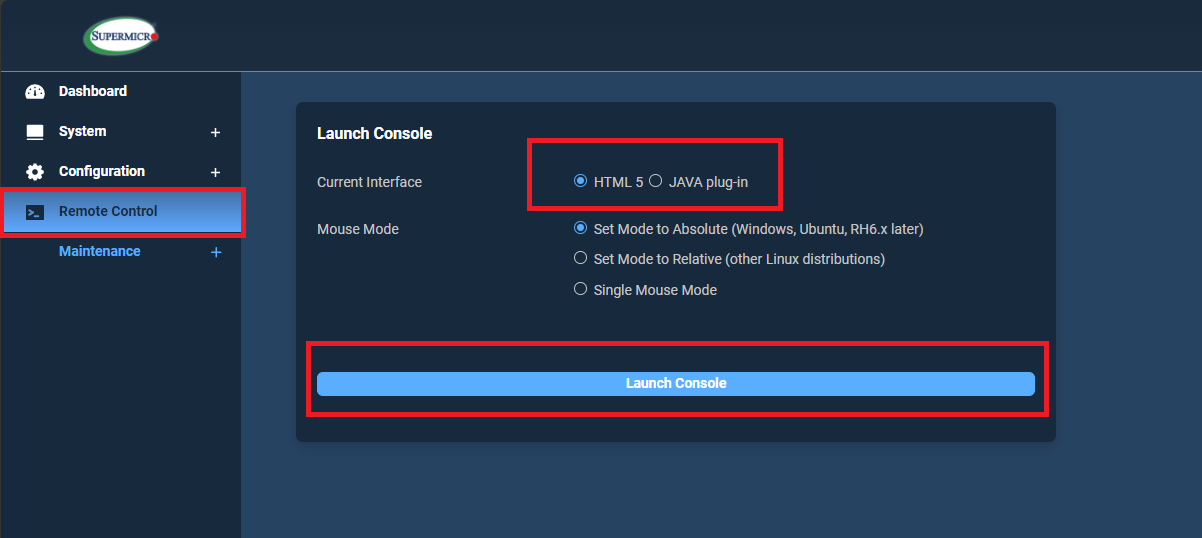
Press Remote Control in the pane to your left, then chose HTML5 or JAVA and press Launch Console
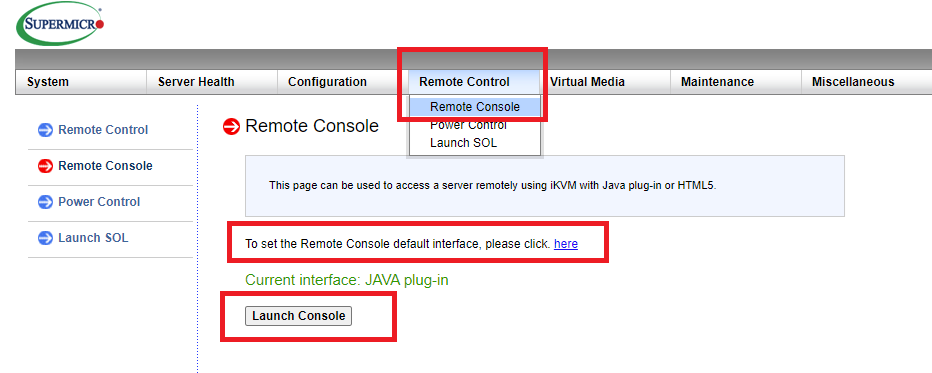
Press Remote Control followed by Remote Console. You can change between HTML5 and JAVA by clicking the link. When ready, press Launch Console
Java or HTML5?
The primary difference between Java and HTML5 is that HTML5 does not require Java to be installed on your client to access your server remotely. However, mounting ISO files using the HTML5 client requires a license, which is not necessary when using Java.
If you primarily use the remote function for everyday tasks, HTML5 is a good option. However, if you need ISO support and don’t have a license, you should use the Java option.
Note: If you plan to use Java, make sure you have the latest IPMI-firmware installed, or else you might have issues with older encryption standards and certificates.
Note: If you have an older server, it might only have Java as an option.
IMPI using the IPMIView application
If you prefer not to use a web browser or if your server has an older version of IPMI, you might want to use the IPMIView application provided by SuperMicro.
You can download the latest version of IPMIView here: https://www.supermicro.com/wdl/utility/IPMIView/. This guide focuses on the Windows version of IPMIView.
Download the zip file, extract it, and install the software. Be sure to start the application with administrative privileges.
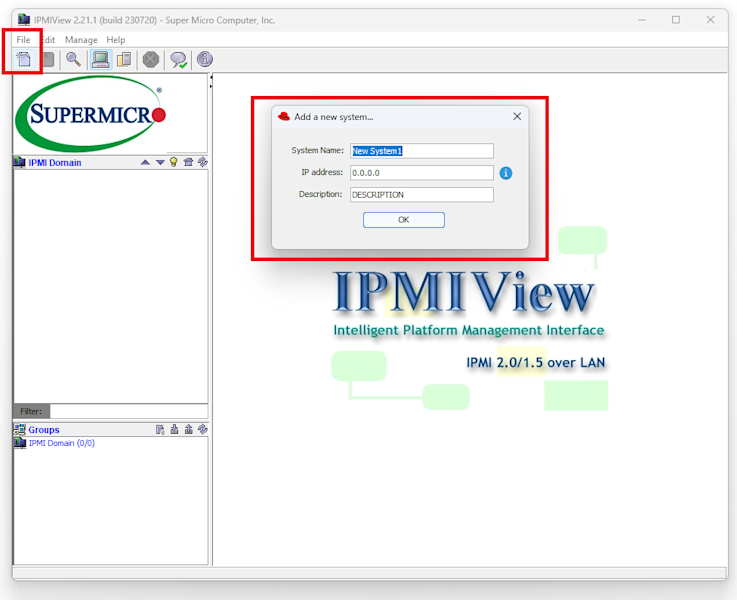
When started, from the Menu, click the Document-icon and enter your IPv4-address.
System Name and Description is optional.
Enter your credential and press Login. An image saying Connected should appear if the login was a success. Click on the tab KVM Console down to your right.
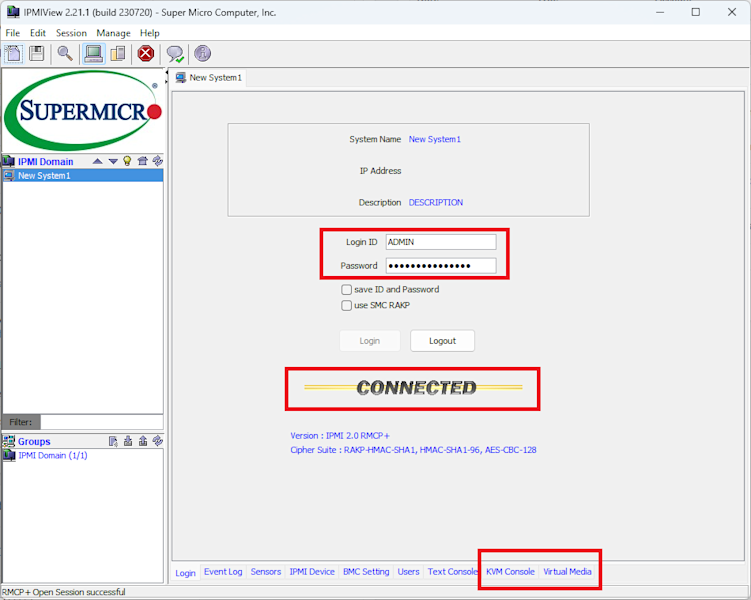
Press Launch KVM Console.
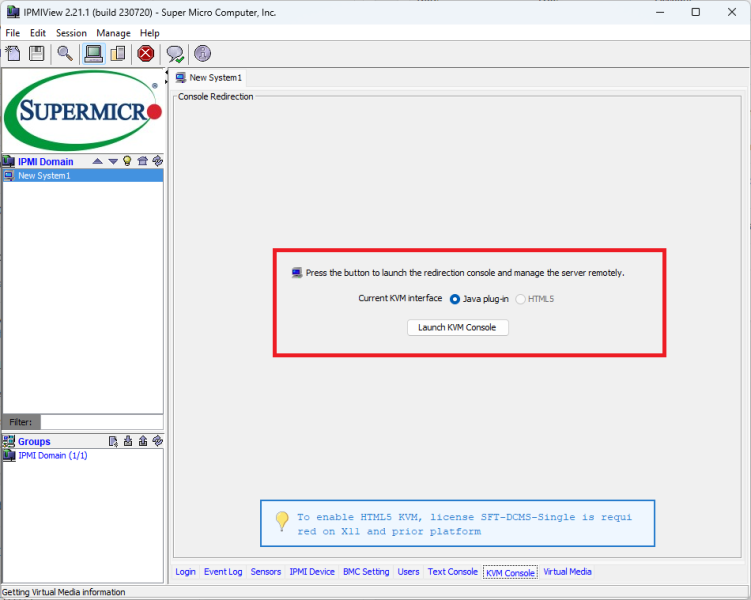
You should now have access to your server. In the Virtual Media menu, you can access the ISO-mounting feature and a virtual keyboard.
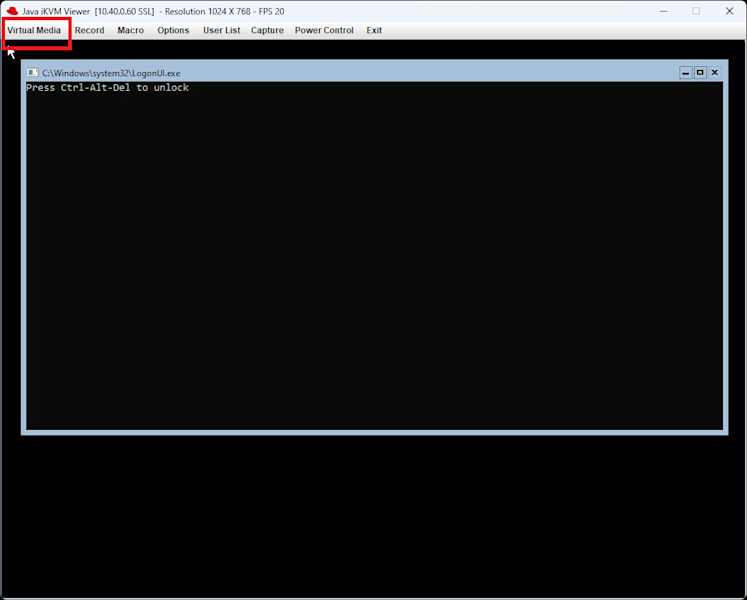
Note: You can always access your server using IPMI, even if your server has suffer from a kernel panic, BSOD or is stuck in POST.
Hittar du inte det du söker?
Kontakta oss gärna för mer information. Vi hjälper dig att komma fram till den bästa lösningen för dina behov.


