Windows Firewall
Windows Firewall
Table of Contents
Introduction
Windows Firewall is a built-in security feature designed to safeguard your device by filtering incoming and outgoing network traffic. It does this by applying various criteria, such as source and destination IP addresses, IP protocols, and port numbers. You can configure Windows Firewall to permit or block network traffic depending on the specific services and applications installed on your device, enabling you to limit network access to only those programs explicitly authorized to communicate.
As a host-based firewall, Windows Firewall is integrated into the operating system and is enabled by default across all Windows Server editions.
The default behaviour of Windows Firewall is to:
- block all incoming traffic, unless matching a rule.
- allow all outgoing traffic, unless matching a rule.
Before we continue, make sure you can access your server using Console or IPMI.
Windows Server running at GleSYS
We aim to maintain our templates as close to a standard installation as possible. However, to enable our customers to connect to a newly created Windows Server VM, it is necessary to have the Remote Desktop port (3389) open. This can pose a security risk, so it is advisable to restrict access to specific IP addresses after the server is set up.
Note: Virtual or dedicated servers provided by GleSYS do not come with an external firewall and are directly exposed to the internet.
Opening Windows Firewall
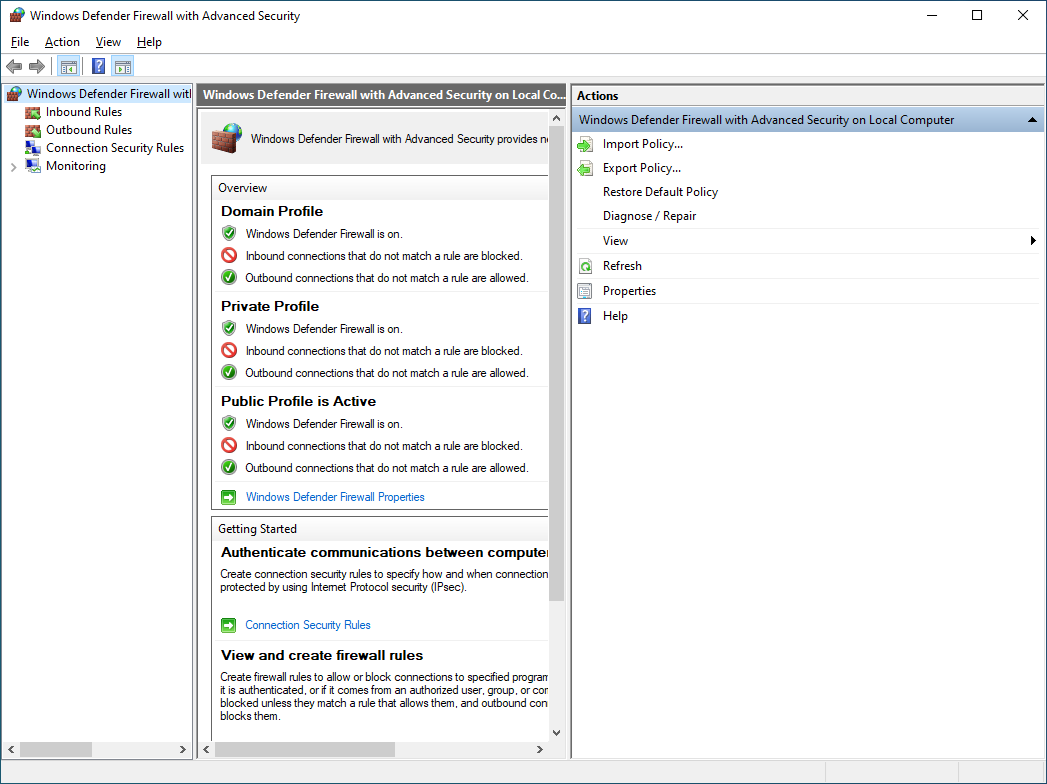
From the Start menu, start typing Windows Defender Firewall with Advanced Security, it should pop as an icon just after a few letters. If you can't find it, try and press Windows-key + R to open the Run-window and type wf.msc. You should have a similar window as below. (This screenshot is from a server running Windows Server 2022)
Backing up your rules
Before we are doing any changes to our firewall, let's start with taking a backup of all our rules.
From the Windows Defender Firewall with Advanced Security-window, navigate to the right pane named Actions and press the text Export Policy in order to save your current rules. You can then use the Import Policy... and select your export in order to revert back your rules.
Creating new rules for RDP
In this example, we will show how to add a new rule, allowing Remote Desktop connections from our VPN.
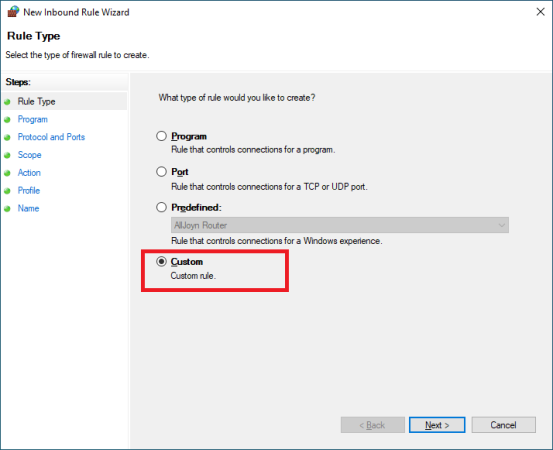
From the Windows Defender Firewall with Advanced Security-window, navigate to the left pane and right-click Inbound Rules and choose New Rule. In the New Inbound Rule Wizard do the following
Rule Type: Custom
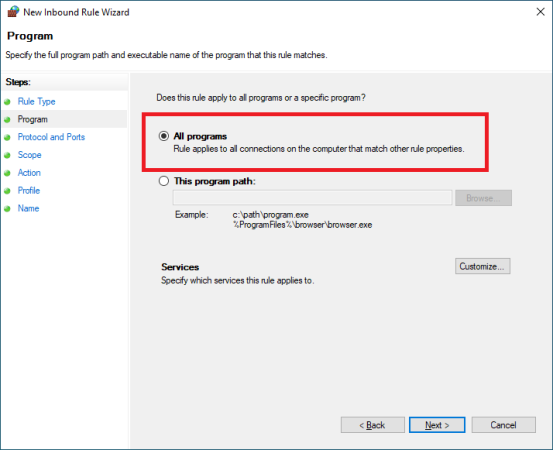
Program: All Program
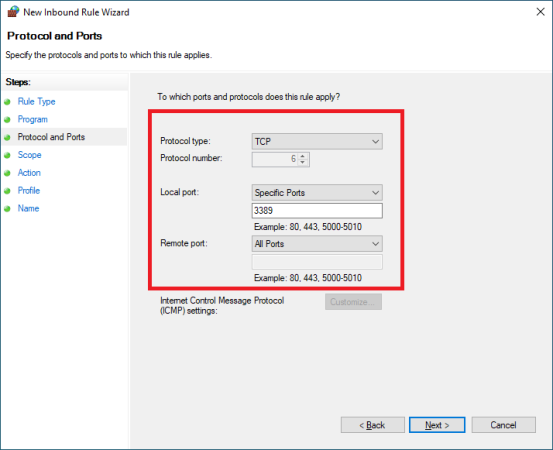
Protocol and Ports
Protocol type: TCP
Local port: Specified Ports -> 3389
Remote port: All Ports
Scope: Add
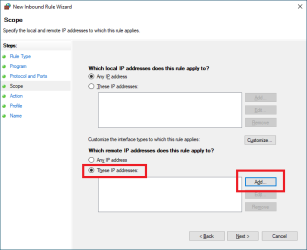
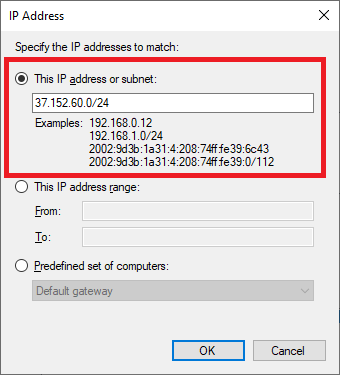
IP Address: 37.152.60.0/24 (This is GleSYS VPN address)
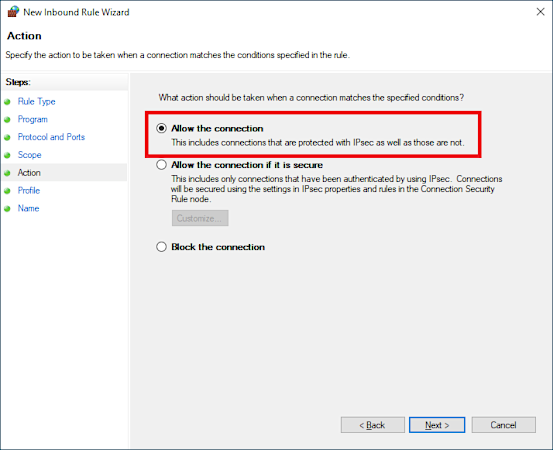
Action: Allow
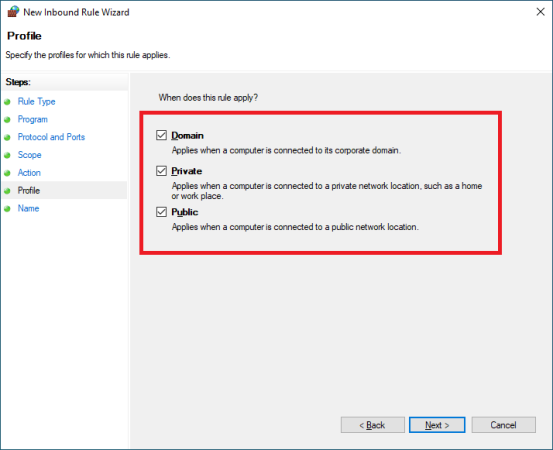
Profile: Tick all profiles
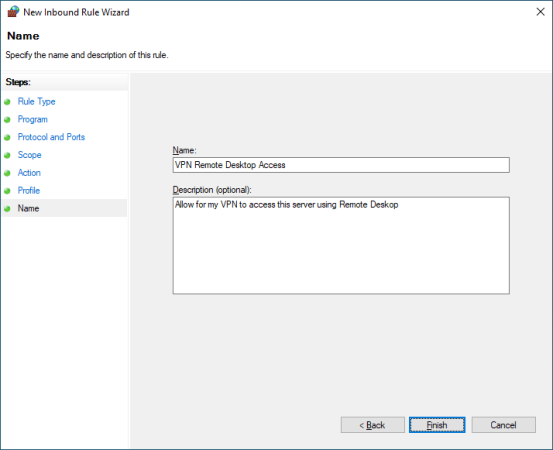
Name: Add a name and Description (Optional) and save. Your rule should now be seen in the list with the other rules.
Disabling the built-in rules
After we created our new rule for Remote Desktop, we should disable the built-in rules, allowing everyone connecting to your server. In the list of rules in your inbound section, scroll down until you find the following rules
Remote Desktop - Shadow (TCP-In)Remote Desktop - User Mode (TCP-In)Remote Desktop - User Mode (UDP-In)
Mark all these three rules, and right-click on one of them and choose "Disable Rule". The green check mark in front of the names should disappear, indicating that they are no longer enabled.
- NOTE: Only do this if you already have added a firewall rule allowing connection from your current IP.
Using PowerShell
If you have created a server running Windows Server Core, or just want to do the above steps using a command prompt, this is how you would do it.
Open PowerShell with administrative access (When running Windows Server Core, type powershell.exe in your prompt if you aren't already in PowerShell)
# Create a backup of your current rules
PS C:\> netsh advfirewall export C:\advfirewallpolicy-backup.wfw

# If you need to restore from your backup
PS C:\> netsh advfirewall import C:\advfirewallpolicy-backup.wfw

# Creating a new rule for GleSYS VPN
PS C:\> New-NetFirewallRule -DisplayName "VPN Remote Desktop Access" -RemoteAddress "37.152.60.0/24" -Direction Inbound -LocalPort "3389" -Protocol TCP -Description "Allow for my VPN to access this server using Remote Deskop"

# Disable the built-in rules
PS C:\> Get-NetFirewallRule | Where-Object Name -match "RemoteDesktop" | Where-Object Enabled -eq "True" | Disable-NetFirewallRule

# To list all your rules
PS C:\> Show-NetFirewallRule
Relaterade artiklar
Hittar du inte det du söker?
Kontakta oss gärna för mer information. Vi hjälper dig att komma fram till den bästa lösningen för dina behov.


